
Basic edits
Basic edits the audio you already have — no regeneration. The performance stays exactly the same, which makes it the right tool for fitting a track to a video.
Before you start
Section titled “Before you start”- A generated take. Select it under Tracks, then press Basic in the Edit this track bar.
Trim to the part you want
Section titled “Trim to the part you want”The waveform shows the whole track with a shaded band over the section you are keeping. Drag the band, or either edge, to move the start and end.
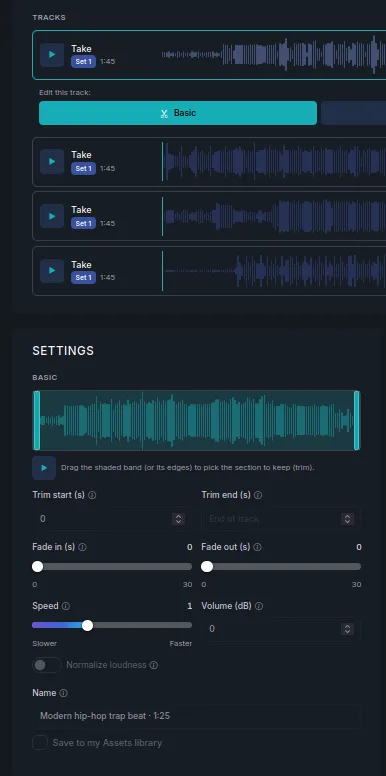
You can also type exact values into Trim start (s) and Trim end (s). Leave Trim end (s) empty to keep the track to its end.
Adjust the sound
Section titled “Adjust the sound”| Control | What it does |
|---|---|
| Fade in (s) / Fade out (s) | Eases the track in and out, up to 30 seconds each. |
| Speed | Plays the track slower or faster. Pitch moves with it, so keep changes small. |
| Volume (dB) | Makes the track louder or quieter. Negative values are quieter. |
| Normalize loudness | Evens the track to a consistent level. Useful when several tracks in one video have different loudness. |
Save the result
Section titled “Save the result”Give it a Name, and tick Save to my Assets library if you want it in your Assets for reuse. The edit is saved as a new track — the take you started from stays as it was.
Next steps
Section titled “Next steps”- Remix a track — when you want a different style, not a different edit.
- Separate stems — to keep only the instrumental.
- Editing a track — how the three edit modes compare.