
Add an avatar (Studio)
An avatar is an AI presenter who speaks the narration to camera — great for a personal intro or sign-off. Add avatar scenes to the timeline and configure each one.
Before you start
Section titled “Before you start”- Open a video in the Video Editor.
- Have an avatar available (yours or a shared one) — see Avatar pricing for how avatar scenes are billed.
Add an avatar scene
Section titled “Add an avatar scene”Open the Avatars tool (top of the left rail), then pick one.
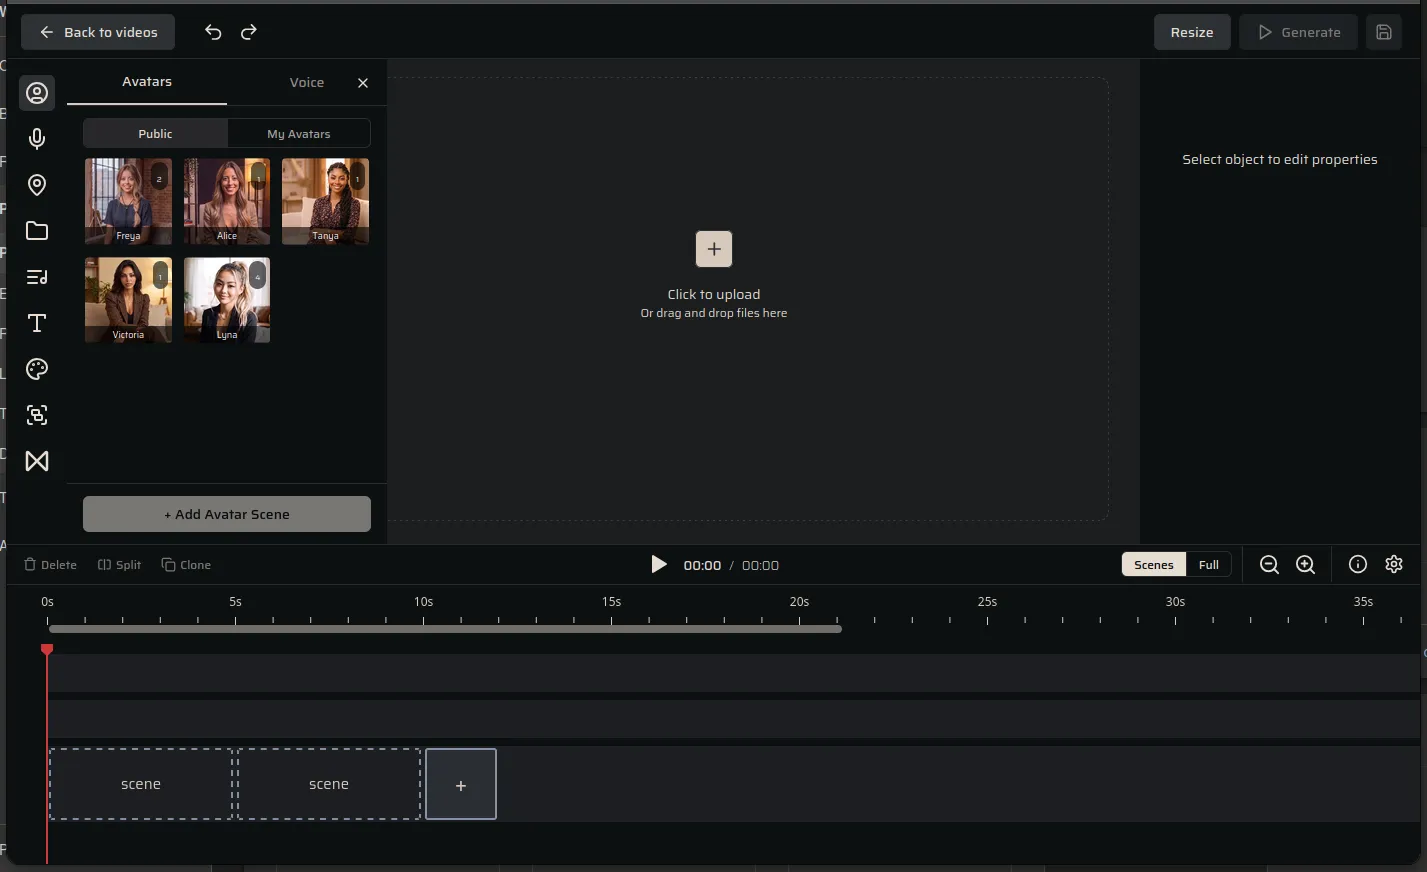
- Public / My Avatars — choose a shared presenter or one of your own.
- Select an avatar, then + Add Avatar Scene to drop it on the timeline.
Give it a line to say
Section titled “Give it a line to say”Switch to the Voice tab (or select the avatar and open Generate speech) to write what it says.
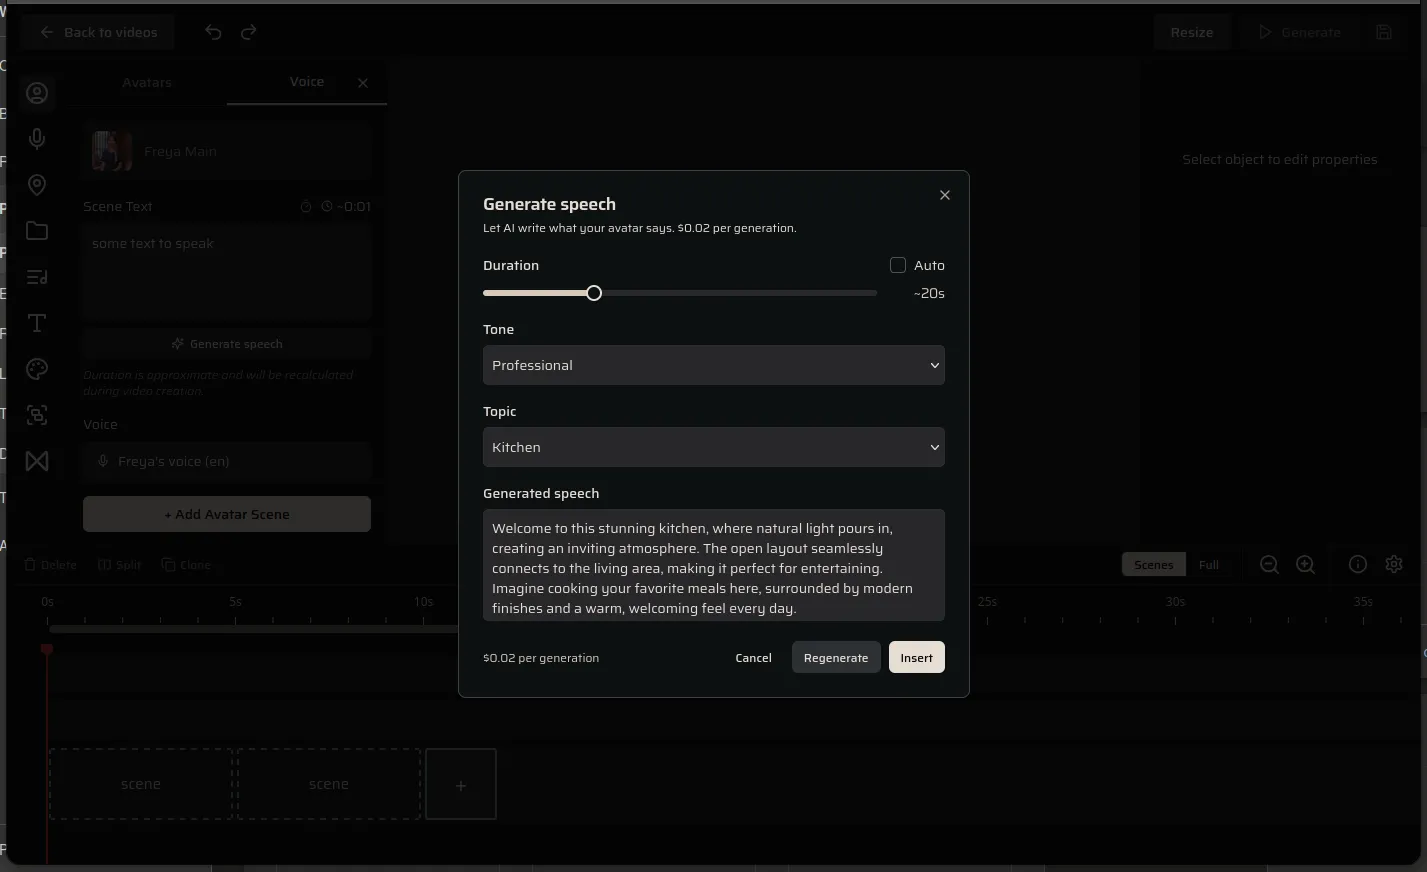
- Duration, Tone, and Topic (e.g. Kitchen, or a Custom prompt) guide what’s written.
- Press Generate, review the text, then Insert. You can edit it afterwards in Scene Text.
Adjust the avatar on screen
Section titled “Adjust the avatar on screen”Select the avatar on the canvas to open its Properties.
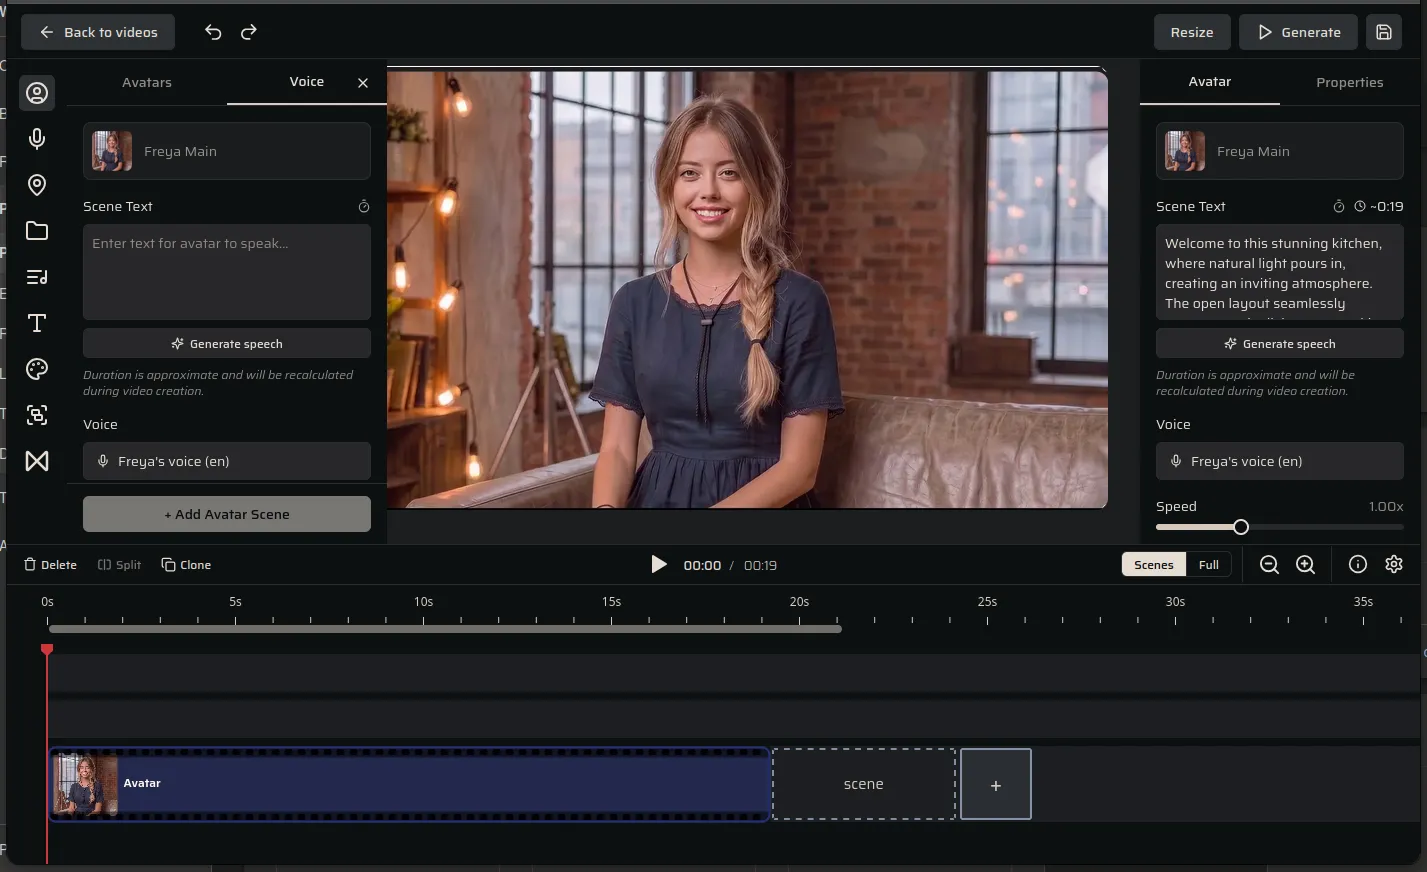
- Scene Text + Voice — the line and the voice that reads it (see Voices); Speed adjusts pace.
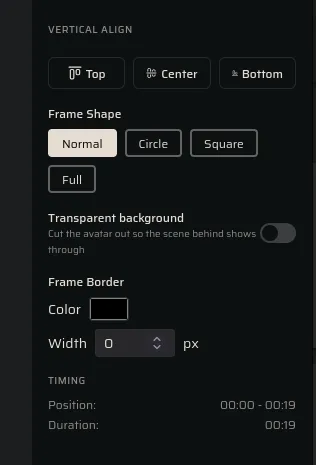
- Frame Shape — Normal, Circle, Square, or Full.
- Transparent background — cut the avatar out so the scene behind shows through.
- Frame Border — colour and width; Timing shows the clip’s position and duration.
Next steps
Section titled “Next steps”- Frame shapes & centering — Circle/Square/Full framing, borders, and face-centering.
- Positioning & layering — put the avatar in a corner (PiP) or over a background.
- Images — add photo and parallax scenes.
- General settings — transitions, text, audio and saving.